Leafbike has been producing a direct drive hubmotor that has earned a place of respect from electric bike enthusiasts, and I decided it’s time to explain why it keeps beating the competition in this size range. So, lets take a look…
The thing that makes this special is the extra-thin 0.35mm laminations in the stator-core, and I’ll get to that in just a bit. But first…I’d like to talk a bit about the popularity of direct drive hubmotors in this size range. The most affordable ebike kits are the so-called 1000W direct drive hubmotors. They typically have a stator using the common 205mm diameter laminations, and then you stack them to make the motor wider if you want more power. There are common hubmotors advertised as 1000W, 1500W, and 3000W which all share the same laminations. This commonality of parts makes these laminations more affordable due to mass production.
Once the width of the lamination stack is assembled, the manufacturer wraps copper wires around each lamination stack “tooth” to make the electromagnets that are turned on and off to spin the motor. The popularity of the 1500W size is due to the fact it is the widest hubmotor that still allows a common bike frame with 135mm wide dropouts to use a common and affordable 7-speed freewheel.
This means that the 1500W size looks almost identical to the common 1000W size externally. The really fat monster QS 205/50H only leaves enough room for a single-speed sprocket, which makes it’s powerful width even more conspicuous.
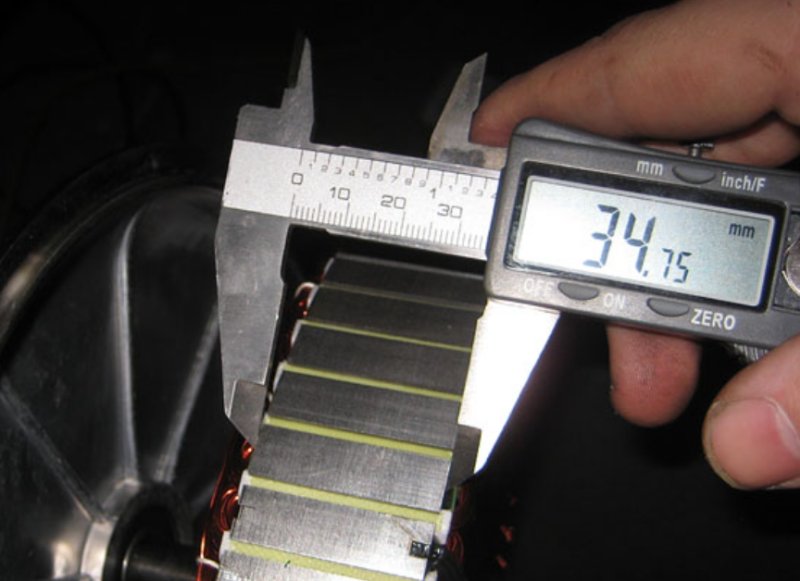
Years ago, when someone who was new to ebikes bought a cheap 1,000W direct drive (DD) hubmotor, they often fell in love with it, but…they wanted more power. Simply adding a more powerful controller and battery usually ended up with a fried motor. So…they went back to the internet and bought a larger Crystalyte H35. The “35” in the name is because the rotor magnets have a “Height” of 35mm, and as a result, the matching lamination stack is also 35mm wide. The 1000W hubmotors typically had a 28mm wide stator.
These 35mm wide stator-motors performed just fine when you limited them to the nominal 1500W, but…their performance was outstanding if you doubled that for a few seconds for a burst of acceleration using 3,000W.
_________________________________________________
Thin Laminations
The real magic is in the thin laminations. It sounds odd that a slightly thinner lamination could have a big effect, but it does. What’s even stranger is that it costs less than $10 per motor to switch from the common 0.50mm laminations to the thinner 0.35mm ones, and yet…they are not as common as you might imagine.
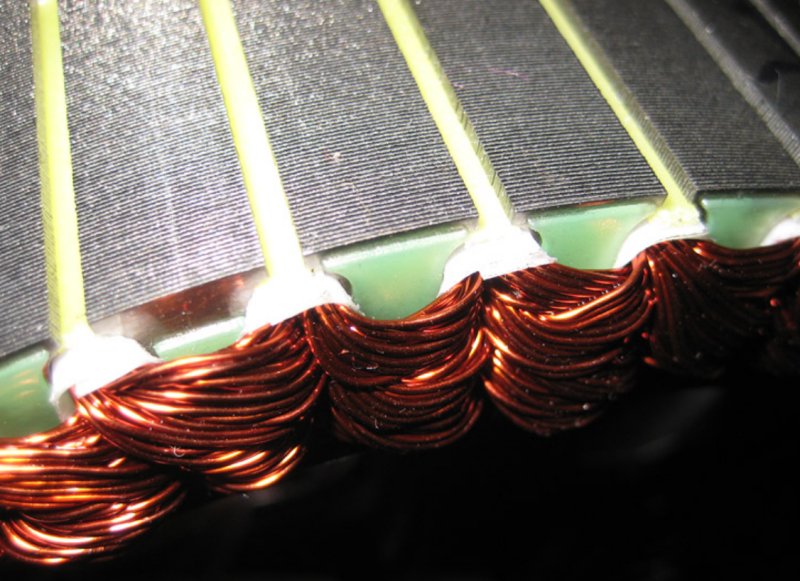
This affects a phenomenon called “eddy currents”. When a magnet passes over a ferrous material (like the iron in the steel laminations), some of the electrons in the iron molecules are pulled and shoved around by the magnetic field of the magnets. After the electromagnets are tuned off and the permanent magnets have passed over, those electrons go back to any nearby imbalanced iron molecules. The longer a distance that they travel back and forth, the more heat they generate. Using thinner laminations limits how far the eddy currents can travel.

Because of this, the Leafbike hubmotors are listed as having a 93% efficiency, which is better than average. Years ago, I though a few more percentage points of efficiency meant that a given motor might provide a little more range from the same battery, so…I didn’t really care about that. Then, I found out that those few percentage points of efficiency meant that the less efficient motor was converting more battery watts into waste-heat. As a result, fewer of your battery watts were converted into work. The Leafbike 1500W hubmotor being able to take high power while producing less waste-heat is where the magic is.
So, how much power can the Leafbike 1500W really take? Electric bike kits from China are frequently found to have wildly inaccurate power ratings. Some are down-rated to make a powerful component seem legal, and others are over-rated to impress buyers with how powerful they are. Based on several years of ebike hot-rodders using this hubmotor, I can confidently say that 50V X 30A is it’s constant rating, meaning that…if you load it down enough to continuously draw 1500W, it will not burn up.
If you’ve read many of the articles we’ve written in the past, you’ll know that a hubmotor’s temporary peak rating is usually twice the continuous power level. This means I’m rating this motor as being capable of 3,000W for quite a bit of time before you have to let off the power and let it cool down some. That’s pretty nuts for a hubmotor that’s not very large or heavy. It gets even crazier if you read the next section below on heat shedding mods…
_________________________________________________
Getting Rid of the Heat
Somewhere around 3,000W, this motor reaches saturation. This means that if you add more amps above that, you will get a little more power, but no where as much as when you are using a lower power level. The amount of copper mass in a 35mm wide stator can take 30A all day, but somewhere around 60A the heat really starts to increase a lot per additional amp. If you occasionally hit this motor with 60A, you might not want to do that for very long. It will drain your battery fast, and it will “heat soak” the stator windings, because you are also exceeding this motors ability to shed heat.
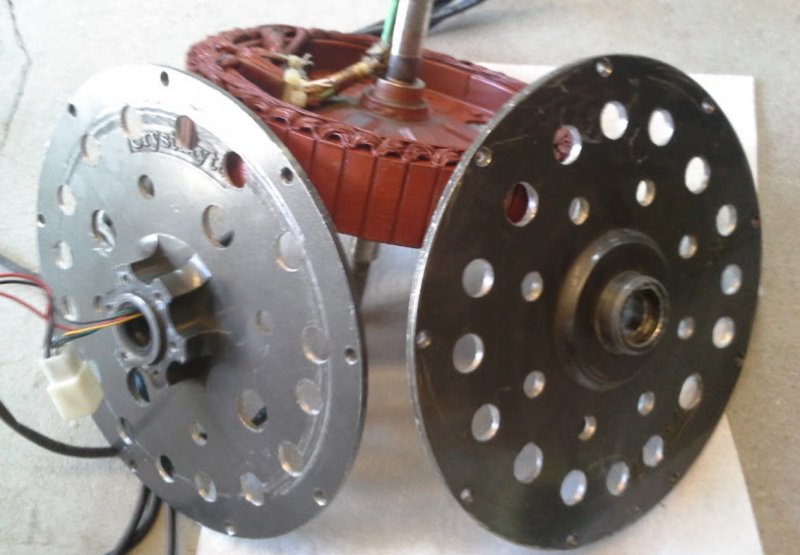
A few years ago there were a lot of experiments about how to help these hubmotors shed more heat. The most simple and obvious method was to cut large holes in the side-plates. If you added a temp sensor to the stator (highly recommended for all hot-rodded hubmotors), That would tell you when you were approaching a danger zone where the heat might damage the stator. This kind of modification allowed you to use 60A more frequently, and for longer amounts of time for each time that you hit it.
However, cutting large holes in the side-plates allows dirt to get into the inside of the motor, which can damage the axle bearings, among other things. Doing this still works for a short-term race, but it’s not a solution I recommend for long-term commuting. If you want to keep the hubmotor shell sealed-up, the remaining options are…adding ATF, upgrading to a cast aluminum stator core, or adding ferro-fluid (FF).
_________________________________________________
ATF, Cast Aluminum Core, or Ferro-Fluid?
Although the sideplates of a DD hubmotor are aluminum (which is known to absorb and shed heat well), there is an air-gap between the hot electromagnets in the stationary stator and the spinning permanent-magnet rotor. If you add about a coffee-cups worth of synthetic Automatic Transmission Fluid (ATF) to the inside of the hubmotor, this fluid spreads out as soon as the motor starts spinning, and it fills that air-gap. This provides a path to speed up the heat in the stator reaching the aluminum side-plates, so the heat can be shed to the outside air.
This is good for high-amp performance, but it comes at a price. No matter how well you try to seal up the side-plates, the ATF will occasionally leak out and drip, or worse it will be flung onto the rear brakes. Testing has even verified that that the core of the motor heating up and cooling off causes the motor to “breathe” through tiny air-gaps in the copper wire strands in the motor phase wires, so…you must also add a small vent to a side-plate to prevent pressure differences. Adding ATF is like the ventilation-holes we talked about before…good for a race, but not worth it for a long-term street-fighter.
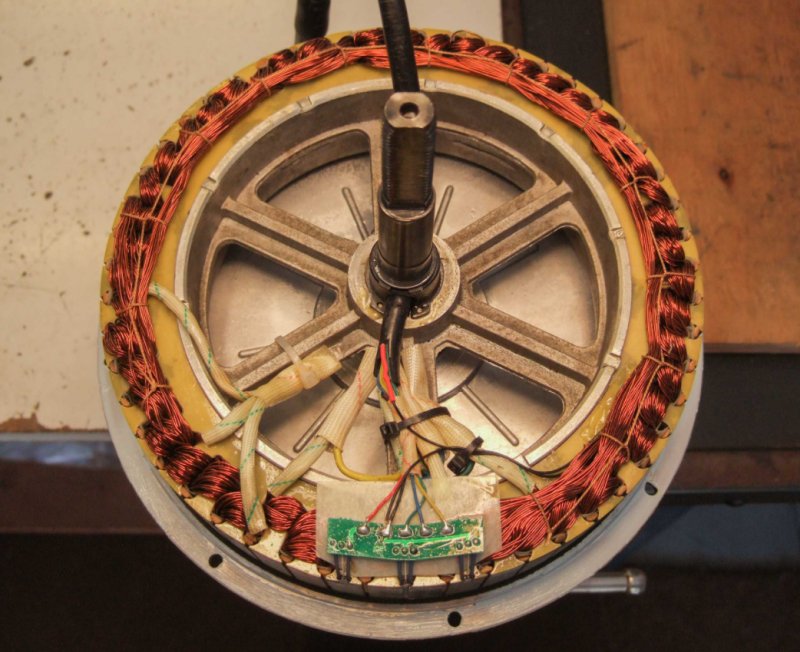
And this brings us to the option of using a cast aluminum stator core instead of a thin steel stamped plate. Of course the core of the individual stator electromagnets are still stacks of this laminated steel sheets, but between the axle and the electromagnets there needs to be some support structure. I bought a hubmotor once with a cast aluminum core, and it worked as advertised. The thick aluminum mass absorbed heat-spikes from temporary high amps, and then shed that heat over time when I was cruising along at my top speed. Hard acceleration draws high amps, but maintaining speed actually draws very few amps by comparison.
So, why isn’t that what I’m recommending? It works and there’s nothing wrong with it. The cast aluminum core was first seen on the large motorcycle hubmotors, like the QS 205/50H. Due to popular demand, even the mid-sized hubmotors have had this option added to their catalog. The MXUS 3000W can be purchased ether way, with a core of stamped steel or cast aluminum. The bottom line is that the cast aluminum stator core is more expensive, and heavier.
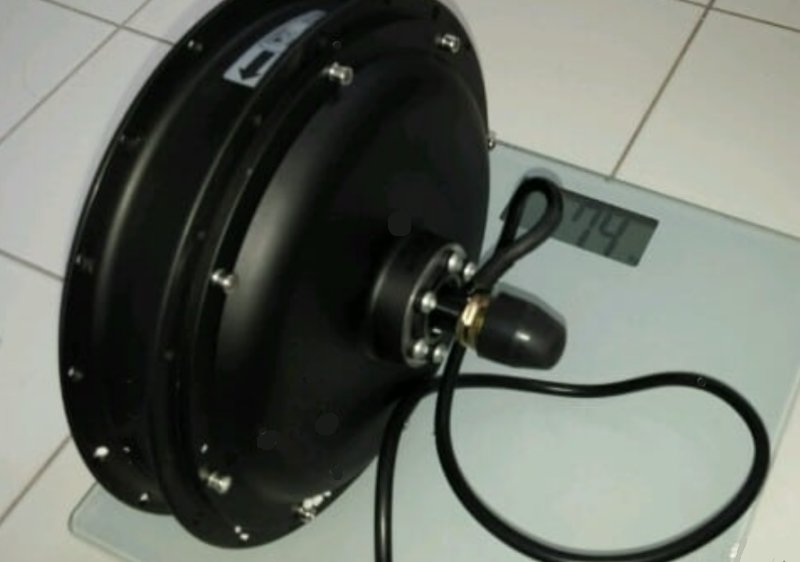
When an electric motorcycle is using 8,000W or more, a few extra pounds or kilos of weight in the motor isn’t that noticeable, but…the Leafbike 1500W really shines when its used in a fairly light downhill bicycle frame due to its reasonable weight, and exceptional power.
And this brings us to the final option, which is the one I recommend. Adding Ferro-Fluid (FF) means that you have dramatically improved this motors heat-shedding ability, and that means you can use 3,000W or 60A very frequently, and for surprisingly long stretches.
_________________________________________________
Ferro-Fluid and the Leafbike hubmotor
FF was developed to help the magnets in high-performance speakers to shed heat, which allowed smaller speakers to be driven to a louder sound level. It doesn’t run out through tiny gaps because it sticks to magnets, like the permanent magnets in the rotor of an ebike hubmotor.
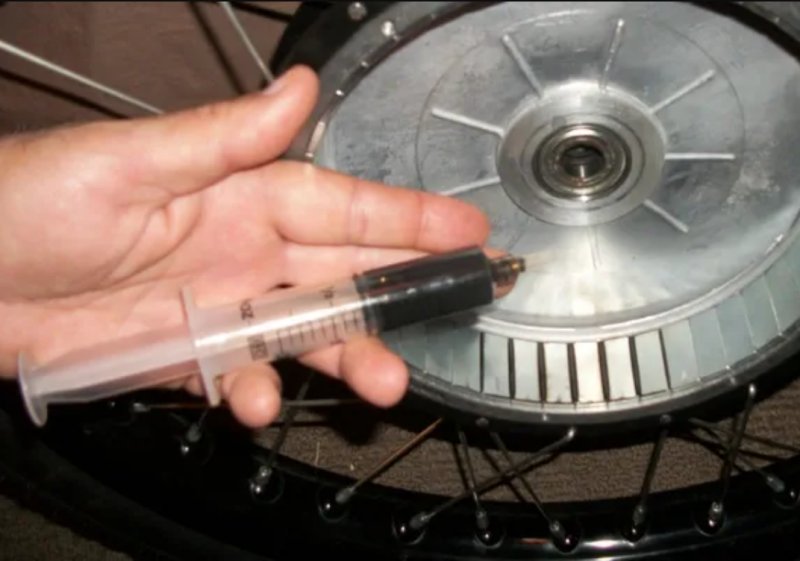
We wrote about FF in 2017 (to see that article, click here), and after several years of hot-rodders using it, no downsides have been discovered. This stuff works. It was so popular, we also wrote an installation guide in 2018 (to see that article, click here). Using FF means you can have the lighter version of a hubmotor, while still having the high peak power potential.
_________________________________________________
Why not 72V?
Running the Leafbike motor at 72V can be done (20 cells in series / 20S), and that does provide more power with no additional heat. However I am a big fan of 48V or 52V for ebikes. This is a much safer voltage range to work with, the batteries are cheaper, and there is a better selection of batteries.
On a side-note, if you ever have a power outage, the inverters that are labeled as 48V-input will accept both 13S and 14S battery packs for the input (48V and 52V). This means that these electric bike batteries can power an inverter to provide 120V AC in an emergency.
If you read our article on understanding motor terms (to read that article, click here), this size of motor can have the option of several different windings, called a motors “Kv”. This affects how many RPM’s you will get per volt that you apply to the motor.
Since all these different Kv options use the same stators, they all have the same amount of airspace around each stator-tooth. This means that the coils can be made from many wraps of thinner wire, or fewer wraps of thicker wire. Since the faster Kv motors (lower turn-count) use fatter wire, they have less resistance, even if you only use half of their higher speed potential. Listed below are the turn-counts available from Leafbike. I recommend the 4-Turn, even if you don’t actually travel at that high of a top-speed. The top road-speeds listed below are for a 26-inch wheel and a 2-inch tire.
4T / 13.1 Kv = 631rpm @ 48V = 39mph
5T /10.1 Kv = 485rpm @ 48V = 30mph
6T / 7.0 Kv = 336rpm @ 48V = 21mph
Leafbike calls the 4T model their “45 MPH” Kv winding, but that speed is with the motor unloaded and spinning in the air.
_________________________________________________
A Cargobike Proposal
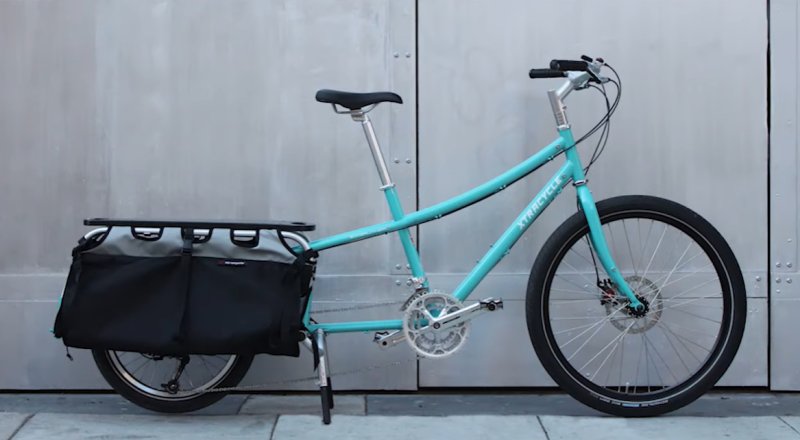
I occasionally get asked what about what type of system is the most reliable. My favorite ebike is a mid-drive, but I have to admit that the simplicity of a DD hubmotor is hard to beat. And one more way that you could make it climb hills better with less heat is to lace it to a smaller rim, like a strong 20-inch BMX rim. This lowers the top-speed, and increases the wheel torque, without any other changes.
_________________________________________________
What Controller?
If you are a longtime hot-rodder, you don’t need any advice from me about controllers. However, if you are fairly new to the ebike game, I would definitely recommend that you stick with the factory controller and throttle for your first time around (also, get a spare throttle for troubleshooting, they are cheap). This guarantees that the components are all plug and play. A sine-wave controller would cost slightly more, but would run nearly silent. The affordable stock controllers use a “trapezoidal wave” which is sometimes called a square-wave, and they have a slight buzzing noise when accelerating.
I have found the Leafbike website to be a bit awkward to navigate, but the standard controller for the Leafbike 1500W kit is a 40A unit using 12-FETs, but…they do stock an 18-FET controller that is rated for 55A. If you want the larger controller, search for:
“48V / 52V 2000W fat snow bike motor controller“

In the pic below, we can see the Leafbike uses the common size and shape of lamination with 51 stator teeth. It’s 3-phase, so 17 electromagnets per phase. The rotor has 46 neodymium permanent-magnets, so when programming a custom controller you would input 23 “pole pairs” (they alternate north and south facing the stator). Radial outrunner with three Hall sensors so the controller knows the position of the rotor as it spins. A beefy thick axle. The black plate in the center is the thin stamped-steel stator support. The phase wires are a thick 3mm-squared in cross-section area. It actually “looks like” dozens of other hubmotor models, but this pic doesn’t show that the laminations are 0.35mm thick, instead of the common thicker 0.50mm. That is where the efficiency and low heat come from.

For a link to just the bare motor, click here.
For a link to the full Leafbike 1500W kit, click here
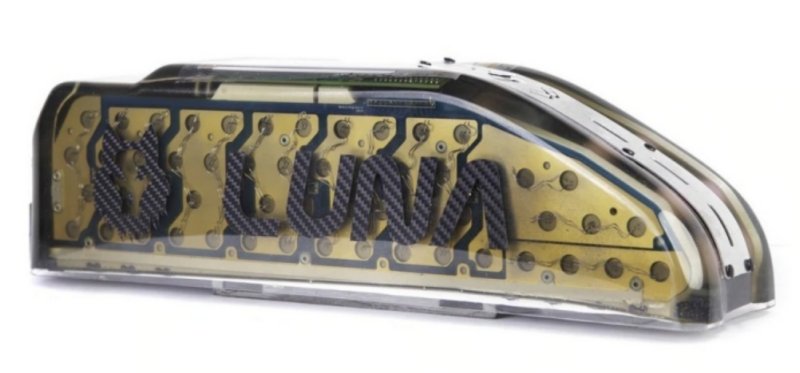
As far as the battery, if you don’t have a preference, I recommend the 52V Luna Cycles Wolf pack. If you like this option, specify the power version that can put out 50A.
_________________________________________________
Written by Ron/spinningmagnets, March 2022
Source link

